Midjourney AI Guide 2026: Midjourney से प्रोफेशनल AI Images कैसे बनाएं? (Complete Step-by-Step Guide)
Artificial Intelligence (AI) की दुनिया में Midjourney AI सबसे लोकप्रिय Image Generator Tools में से एक बन चुका है। अगर आप YouTube Thumbnail, Blog Featured Image, Instagram Post, Logo, Wallpaper, Digital Art या Professional AI Images बनाना चाहते हैं, तो Midjourney आपके लिए एक बेहतरीन विकल्प है।
इस Complete Hindi Guide में आप सीखेंगे कि Midjourney क्या है, इसे कैसे इस्तेमाल करें, Account कैसे बनाएं, Prompt कैसे लिखें, Best Settings क्या हैं और 2026 में इसका सही उपयोग कैसे करें।
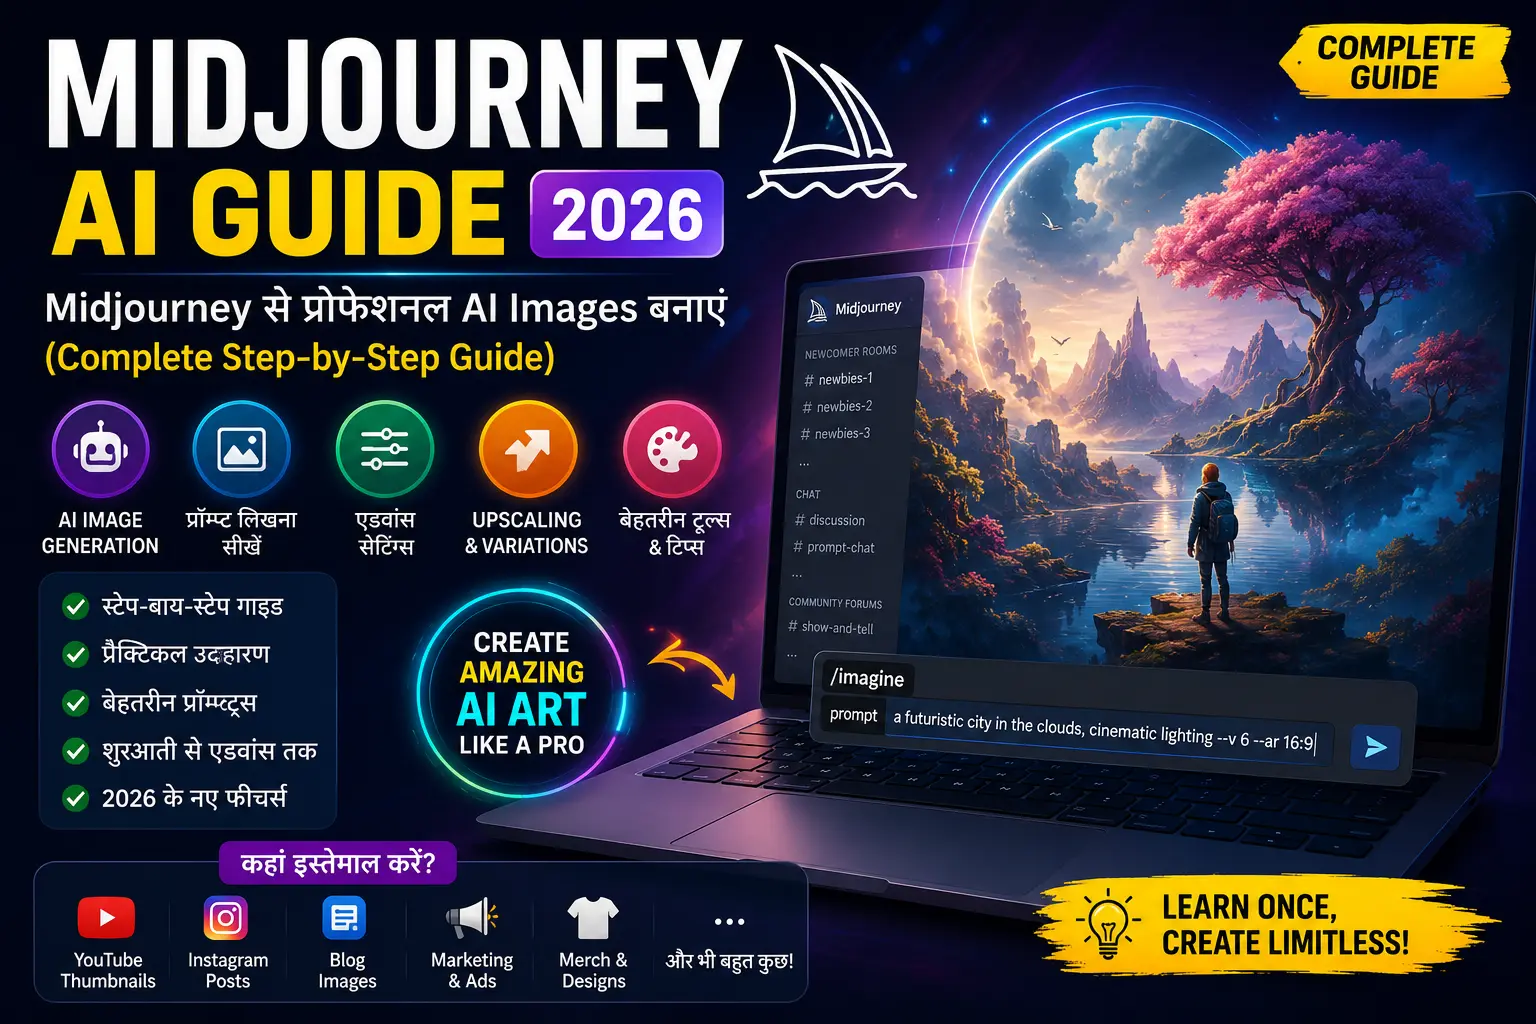
Table of Contents
- Midjourney क्या है?
- Midjourney की मुख्य विशेषताएँ
- Midjourney कैसे काम करता है?
- इस्तेमाल करने के लिए क्या चाहिए?
- Midjourney Account कैसे बनाएं?
- Pricing Plans
- Prompt कैसे लिखें?
- Best Settings
- Professional Tips
- FAQ
Midjourney AI क्या है?
Midjourney एक Advanced Artificial Intelligence Image Generator है जो केवल Text Prompt की मदद से बेहद शानदार और Professional Images तैयार करता है।
यदि आप लिखते हैं—
"A futuristic city at sunset with flying cars, ultra realistic, cinematic lighting"
तो Midjourney कुछ ही सेकंड में उस Description के अनुसार शानदार AI Image बना देता है।
इसी वजह से आज लाखों Designers, Bloggers, Content Creators, Digital Artists और YouTubers Midjourney का उपयोग कर रहे हैं।
2026 में Midjourney AI Image Generation की दुनिया का सबसे Powerful Tool माना जाता है क्योंकि इसकी Image Quality बाकी कई AI Tools से बेहतर होती है।
Midjourney AI की मुख्य विशेषताएँ
- Ultra Realistic AI Images
- Photorealistic Portraits
- Fantasy Art
- Anime Style Images
- Cinematic Posters
- YouTube Thumbnail Design
- Product Mockups
- Logo Concepts
- Social Media Graphics
- High Resolution Upscaling
- Style Reference Support
- Image Reference Support
- Character Consistency
- Commercial Use Support (Paid Plans)
अगर आप Blogging करते हैं या YouTube Channel चलाते हैं, तो Midjourney आपकी Creative Workflow को कई गुना तेज बना सकता है।
Midjourney कैसे काम करता है?
Midjourney एक AI Model है जिसे करोड़ों Images और Visual Patterns पर Train किया गया है।
जब भी आप कोई Prompt लिखते हैं, AI उस Prompt का अर्थ समझता है और उसके अनुसार बिल्कुल नई Image तैयार करता है।
उदाहरण के लिए यदि Prompt होगा—
A cyberpunk tiger wearing futuristic armor, neon lights, ultra detailed, 8K
तो AI उसी Concept की नई Image बनाएगा। यह किसी Image की Copy नहीं करता बल्कि बिल्कुल नया Artwork तैयार करता है।
इसी वजह से Midjourney Digital Artists के बीच सबसे लोकप्रिय AI Tool बन चुका है।
Midjourney इस्तेमाल करने के लिए क्या चाहिए?
Midjourney शुरू करने से पहले आपके पास निम्न चीज़ें होनी चाहिए—
- एक Email ID
- Discord Account
- Internet Connection
- Computer या Smartphone
- Paid Midjourney Subscription (यदि आवश्यक हो)
हालांकि अब Midjourney का Web Interface भी उपलब्ध है, लेकिन कई Advanced Features Discord के माध्यम से अधिक आसानी से उपयोग किए जा सकते हैं।
Midjourney किन लोगों के लिए सबसे उपयोगी है?
- Bloggers
- YouTubers
- Graphic Designers
- Freelancers
- Social Media Managers
- Marketing Agencies
- Students
- Digital Artists
- Print-on-Demand Sellers
- E-commerce Store Owners
यदि आपका काम Images, Branding या Content Creation से जुड़ा है, तो Midjourney आपके समय और मेहनत दोनों की बचत कर सकता है।
विश्वसनीय स्रोत (Recommended Resources)
Part 1 समाप्त।
Part 2 में हम सीखेंगे:
- Midjourney Account कैसे बनाएं
- Discord Setup
- Web Version का उपयोग
- पहली AI Image Generate करना
- Basic Commands
- Prompt Structure
Midjourney Account कैसे बनाएं? (Step-by-Step Guide)
यदि आप पहली बार Midjourney इस्तेमाल कर रहे हैं, तो शुरुआत करना काफी आसान है। नीचे दिए गए स्टेप्स को फॉलो करके कुछ ही मिनटों में अपना अकाउंट तैयार कर सकते हैं।
Step 1 : Official Website खोलें
सबसे पहले Midjourney की Official Website पर जाएँ और Sign In पर क्लिक करें।
Step 2 : Discord Account से Login करें
Midjourney लंबे समय तक केवल Discord के माध्यम से चलता था। आज भी Discord सबसे लोकप्रिय तरीका है।
यदि आपके पास Discord Account नहीं है तो पहले एक नया Account बना लें।
Step 3 : Permission Allow करें
Discord Login के बाद Midjourney आवश्यक Permissions मांगेगा। सभी Permissions Allow करें।
Step 4 : Subscription चुनें
अब अपनी जरूरत के अनुसार Plan चुनें और Payment Complete करें।
इसके बाद आपका Midjourney Dashboard तैयार हो जाएगा।
Midjourney Web Version कैसे इस्तेमाल करें?
2026 में Midjourney का Web Version पहले से कहीं अधिक Powerful हो चुका है।
अब अधिकांश Users सीधे Browser से Images Generate कर सकते हैं।
Web Version के फायदे
- Discord की जरूरत नहीं
- Modern Dashboard
- Image Gallery
- Prompt History
- Fast Editing
- Easy Upscaling
- Style Library
यदि आप Beginner हैं तो Web Interface ज्यादा आसान रहेगा।
Discord में Midjourney कैसे Use करें?
यदि आप Discord Method इस्तेमाल करना चाहते हैं तो नीचे दिए गए Steps Follow करें।
- Discord Open करें।
- Midjourney Server Join करें।
- Newbies Channel खोलें।
- Message Box में /imagine लिखें।
- Prompt Enter करें।
- Enter दबाएँ।
कुछ सेकंड बाद AI चार अलग-अलग Images तैयार कर देगा।
Midjourney की पहली AI Image कैसे Generate करें?
मान लीजिए आप एक Futuristic City बनाना चाहते हैं।
तो Prompt कुछ ऐसा होगा—
/imagine futuristic smart city at sunset, cinematic lighting, ultra realistic, 8k, highly detailed
कुछ सेकंड बाद Midjourney चार अलग-अलग Images तैयार करेगा।
अब आप इनमें से किसी भी Image को Upscale या Variation में बदल सकते हैं।
Midjourney Pricing Plans 2026
Midjourney समय-समय पर अपने Plans अपडेट करता रहता है, लेकिन सामान्यतः निम्न प्रकार के Subscription उपलब्ध होते हैं।
| Plan | Suitable For | Main Features |
|---|---|---|
| Basic | Beginners | Limited Fast GPU Hours |
| Standard | Creators | Unlimited Relax Mode |
| Pro | Professionals | Private Generation + Extra GPU |
| Mega | Studios | Maximum Performance |
यदि आप केवल सीखना चाहते हैं तो Basic Plan पर्याप्त रहेगा। Professional Freelancers के लिए Standard या Pro Plan अधिक उपयोगी है।
Midjourney Interface को समझें
- Create Tab
- Explore Gallery
- Your Images
- Archive
- Prompt Box
- Style Reference
- Image Reference
- Upscale
- Variation
- Editor
इन सभी विकल्पों को समझ लेने के बाद आप Professional Workflow में काफी तेजी से काम कर पाएंगे।
Midjourney के महत्वपूर्ण Commands
| Command | काम |
|---|---|
| /imagine | नई Image Generate करना |
| /describe | Image से Prompt बनाना |
| /blend | दो Images को Combine करना |
| /info | Account जानकारी देखना |
| /settings | Model Settings बदलना |
Beginner Mistakes जिन्हें Avoid करना चाहिए
- बहुत छोटे Prompt लिखना
- Negative Prompt का उपयोग न करना
- Aspect Ratio भूल जाना
- Style Parameter न जोड़ना
- Image Reference का गलत उपयोग
- Prompt में बहुत ज्यादा Keywords भर देना
- Low Quality Settings चुनना
Part 2 समाप्त।
Part 3 में हम सीखेंगे:
- Professional Prompt Writing Formula
- Best Midjourney Parameters
- Aspect Ratio
- Stylize Value
- Chaos Parameter
- Seed Number
- Image Weight
- Style Reference
- Character Consistency
- Real Examples
Midjourney Prompt क्या होता है?
Midjourney में सबसे महत्वपूर्ण चीज़ Prompt होती है। Prompt वह Text Description है जिसे AI पढ़कर Image तैयार करता है।
जितना स्पष्ट और Detailed Prompt होगा, उतनी ही बेहतर Quality की Image Generate होगी।
यदि Prompt केवल "Cat" होगा तो Result सामान्य होगा, लेकिन यदि Prompt इस प्रकार लिखा जाए—
A majestic white tiger standing on a snowy mountain during sunrise, cinematic lighting, ultra realistic, 8k, highly detailed, masterpiece
तो Result कहीं अधिक शानदार होगा।
Professional Prompt Formula
Best Result पाने के लिए इस Formula का उपयोग करें।
Subject
+
Action
+
Environment
+
Lighting
+
Camera Angle
+
Style
+
Quality
+
Aspect Ratio
+
Parameters
उदाहरण:
A futuristic Indian businessman working inside a luxury AI office, holographic screens, cinematic lighting, ultra realistic, Sony A7R IV photography, 8k --ar 16:9 --stylize 300
एक Perfect Prompt में क्या-क्या होना चाहिए?
| Element | Example |
|---|---|
| Subject | Young Indian Woman |
| Action | Walking |
| Location | Cyberpunk Street |
| Lighting | Golden Hour |
| Camera | 85mm Lens |
| Quality | Ultra Detailed |
| Resolution | 8K |
| Style | Cinematic |
Midjourney Parameters क्या हैं?
Parameters ऐसे Commands होते हैं जो Image की Quality, Size, Style और Creativity को नियंत्रित करते हैं।
इन्हें Prompt के अंत में जोड़ा जाता है।
1. Aspect Ratio (--ar)
Aspect Ratio Image की चौड़ाई और ऊँचाई तय करता है।
| Parameter | Use |
|---|---|
| --ar 1:1 | Instagram Post |
| --ar 16:9 | YouTube Thumbnail |
| --ar 9:16 | Shorts / Reels |
| --ar 3:2 | Photography |
| --ar 4:5 | Instagram Portrait |
2. Stylize (--stylize)
यह Parameter तय करता है कि AI कितनी Creative Image बनाएगा।
| Value | Result |
|---|---|
| 50 | Natural |
| 150 | Balanced |
| 300 | Creative |
| 750 | Highly Artistic |
3. Chaos (--chaos)
Chaos तय करता है कि Image कितनी अलग और Creative होगी।
| Value | Output |
|---|---|
| 0 | Predictable |
| 20 | Balanced |
| 50 | Creative |
| 100 | Maximum Randomness |
4. Seed (--seed)
यदि आप एक जैसी Image बार-बार Generate करना चाहते हैं तो Seed Number का उपयोग करें।
यह Character Consistency और Branding के लिए बेहद उपयोगी है।
5. Quality (--quality)
Quality Parameter Rendering Time और Image Detail तय करता है।
| Value | Result |
|---|---|
| 0.5 | Fast |
| 1 | Standard |
| 2 | Maximum Details |
Best Midjourney Prompt Examples
YouTube Thumbnail
A confident Indian tech YouTuber standing inside a futuristic AI studio, glowing blue lighting, cinematic composition, ultra realistic, 8k --ar 16:9
Blog Featured Image
Artificial intelligence workspace with laptop, holographic interface, premium office setup, realistic photography, ultra detailed, 8k --ar 16:9
Instagram Post
Luxury modern workspace with AI robot assistant, vibrant colors, premium branding, realistic photography --ar 1:1
Wallpaper
Epic cyberpunk city during rainy night, neon lights, cinematic atmosphere, ultra detailed, masterpiece --ar 16:9
Negative Prompt का उपयोग क्यों करें?
यदि आप Image में कुछ चीज़ें नहीं चाहते, तो उन्हें Prompt में Exclude किया जा सकता है।
उदाहरण:
--no blurry, watermark, logo, text, extra fingers, low quality, duplicate objects
इससे Image अधिक साफ़ और Professional दिखाई देती है।
Prompt लिखते समय ध्यान रखने योग्य बातें
- Subject हमेशा स्पष्ट लिखें।
- Lighting अवश्य जोड़ें।
- Camera Lens Mention करें।
- Aspect Ratio चुनें।
- Resolution लिखें।
- Style Define करें।
- Parameters अंत में जोड़ें।
- अनावश्यक Keywords भरने से बचें।
Part 3 समाप्त।
Part 4 में हम सीखेंगे:
- Upscale और Variations
- Character Consistency
- Style Reference
- Image Reference
- Logo Design
- YouTube Thumbnail
- Instagram Images
- Blog Images
- Business Use
- Midjourney Tips & Tricks
Image Upscale क्या है?
जब Midjourney चार Images तैयार करता है, तब आपको उनमें से किसी एक Image को High Resolution में बदलने का विकल्प मिलता है, जिसे Upscale कहा जाता है।
Upscale करने के बाद Image अधिक Sharp, Detailed और Professional दिखाई देती है। यदि आप Blog, Website, YouTube Thumbnail या Print Design के लिए Image डाउनलोड करना चाहते हैं, तो हमेशा Upscale Version का उपयोग करें।
- बेहतर Resolution
- ज़्यादा Details
- Professional Quality
- Print Ready Output
Variations Feature क्या है?
अगर आपको कोई Image पसंद है लेकिन उसमें थोड़ा बदलाव चाहिए, तो Variations Feature का उपयोग करें।
यह उसी Concept की नई Images तैयार करता है, जिससे आपको एक ही Idea के कई अलग-अलग Designs मिल जाते हैं।
Variations कब उपयोग करें?
- Color बदलने के लिए
- Background बदलने के लिए
- Pose बदलने के लिए
- Lighting Improve करने के लिए
- Creative Options देखने के लिए
Character Consistency कैसे बनाए रखें?
यदि आप Comic Story, Animation, Brand Mascot या YouTube Character बना रहे हैं, तो हर Image में Character का एक जैसा दिखना बहुत जरूरी है।
इसके लिए Midjourney में Seed Number, Character Reference और Style Reference का उपयोग किया जाता है।
Best Practices
- एक ही Seed Number रखें।
- Prompt में Character का पूरा Description लिखें।
- हर Prompt में समान Camera Style रखें।
- Lighting बदलने से बचें।
- Image Reference का उपयोग करें।
Style Reference क्या है?
Style Reference की मदद से आप किसी एक Art Style को दूसरी Images में भी Maintain कर सकते हैं।
उदाहरण के लिए यदि आपको Watercolor Style, Pixar Style, Anime Style या Cinematic Photography पसंद है, तो उसी Style को बार-बार उपयोग किया जा सकता है।
Popular Styles
- Realistic Photography
- Anime
- Pixar
- Cyberpunk
- Fantasy
- Watercolor
- Oil Painting
- Minimal Illustration
- 3D Render
- Cinematic Movie Poster
Image Reference क्या है?
यदि आपके पास पहले से कोई Image है और आप उसी जैसी नई Image बनाना चाहते हैं, तो Image Reference Feature सबसे उपयोगी विकल्प है।
Image Upload करने के बाद उसका URL Prompt में जोड़कर AI उसी Style से प्रेरित नई Images तैयार करता है।
यह Branding और Product Marketing के लिए काफी उपयोगी Feature है।
Midjourney से Logo कैसे बनाएं?
Logo Design के लिए Prompt हमेशा Simple और Minimal रखें।
Example Prompt
Minimal modern AI technology logo, blue and white colors, vector style, clean design, premium branding, white background
Tips
- Vector Style लिखें।
- White Background रखें।
- Simple Colors चुनें।
- Minimal Design रखें।
YouTube Thumbnail कैसे बनाएं?
YouTube Thumbnail के लिए High Contrast Colors, Face Expression और Bold Composition सबसे अच्छा परिणाम देते हैं।
Sample Prompt
Indian YouTuber surprised expression, futuristic AI background, glowing neon colors, cinematic lighting, ultra realistic, 8k --ar 16:9
Thumbnail बनाते समय Text बाद में Canva या Photoshop में जोड़ना बेहतर रहता है।
Blog Featured Image कैसे बनाएं?
SEO Blog के लिए Featured Image Professional और Clean होनी चाहिए।
Example Prompt
Modern AI workspace with laptop, futuristic holographic interface, realistic office setup, professional photography, ultra detailed --ar 16:9
इस तरह की Images Google Discover और Social Media Sharing में अधिक आकर्षक दिखाई देती हैं।
Social Media Images कैसे बनाएं?
Instagram, Facebook, LinkedIn और X के लिए Square Images सबसे बेहतर रहती हैं।
| Platform | Recommended Ratio |
|---|---|
| 1:1 | |
| 1:1 | |
| 1.91:1 | |
| X (Twitter) | 16:9 |
| 2:3 |
Commercial Use के लिए Midjourney
यदि आपके पास Paid Subscription है, तो Midjourney से बनाई गई Images का उपयोग कई Commercial Projects में किया जा सकता है। हालांकि, उपयोग से पहले वर्तमान License और Terms अवश्य पढ़ें।
इन क्षेत्रों में इसका व्यापक उपयोग किया जाता है:
- Blog Featured Images
- YouTube Thumbnails
- Book Covers
- Advertising Creatives
- Social Media Campaigns
- Print-on-Demand Products
- E-commerce Product Mockups
- Presentation Graphics
Midjourney Pro Tips & Tricks
- Prompt हमेशा English में लिखें।
- Lighting अवश्य जोड़ें।
- Camera Lens का उल्लेख करें।
- Ultra Realistic, 8K और Highly Detailed जैसे Keywords का उपयोग करें।
- Aspect Ratio हमेशा तय करें।
- Image Generate करने के बाद Upscale करें।
- एक ही Prompt के कई Variations बनाएं।
- Style Reference का उपयोग करें।
- Negative Prompt जोड़ें।
- High Quality Images WebP Format में Save करें।
किन गलतियों से बचना चाहिए?
- बहुत छोटे Prompt लिखना।
- Image Ratio भूल जाना।
- Subject स्पष्ट न लिखना।
- Style Mention न करना।
- Negative Prompt छोड़ देना।
- Upscale किए बिना Image Download करना।
- Commercial License पढ़े बिना Images का उपयोग करना।
Midjourney किन-किन क्षेत्रों में उपयोग किया जाता है?
- Digital Marketing
- Blogging
- Graphic Design
- Branding
- Logo Design
- Freelancing
- YouTube Content Creation
- Social Media Marketing
- Book Publishing
- Game Design
- Animation
- Fashion Design
- Interior Design
- Advertising Agencies
Part 4 समाप्त।
Final Part में शामिल होगा:
- Midjourney Pros & Cons
- Best Midjourney Alternatives
- FAQ (Rank Math Optimized)
- Conclusion
- Call To Action
- Article समाप्त करने वाला SEO Section